User Guide
A Serpent usage guide for end users. For Chinese, switch the site language; in the repository see README.md.
- Install — macOS / Windows, upgrades
- Basics — libraries, importing, workspace tabs, custom folder/collection appearance, browsing layouts, tags, collections, and the viewer
- Search and filters — advanced query syntax, filter dimensions, and Shift multi-select
- WebDAV cloud sync — server configuration, library binding, auto-sync, opening remote synced libraries
- AI analysis — supported assets, automatic/manual analysis, jobs, and privacy
- Browser extension — save web images/videos from Chrome / Edge / Firefox
- Using plugins — install, enable, update, and uninstall plugins
- Automation — automation scripts and MCP client connections
- Troubleshooting — common problems and fixes
Quick start
- Install Serpent (see Install)
- Launch the app and create a local library
- Drag images, videos, audio, 3D models, or text into the window, or click Import
- Assets appear on the canvas. Double-click to open the viewer; right-click for more actions. Thumbnails, metadata, and AI analysis complete progressively in the background
Data stays in your local library directory; for syncing across machines, use WebDAV cloud sync (see Sync).
Interface at a glance
A typical workspace has library navigation on the left, the asset canvas in the center, and the Inspector on the right. On Windows, the upper-left Main menu contains File, Edit, Library, Window, About, and Settings (where you can view diagnostic logs and check for updates under About); macOS provides equivalent commands in the native system menu. Import, search, filtering, and sorting stay in the top toolbar.
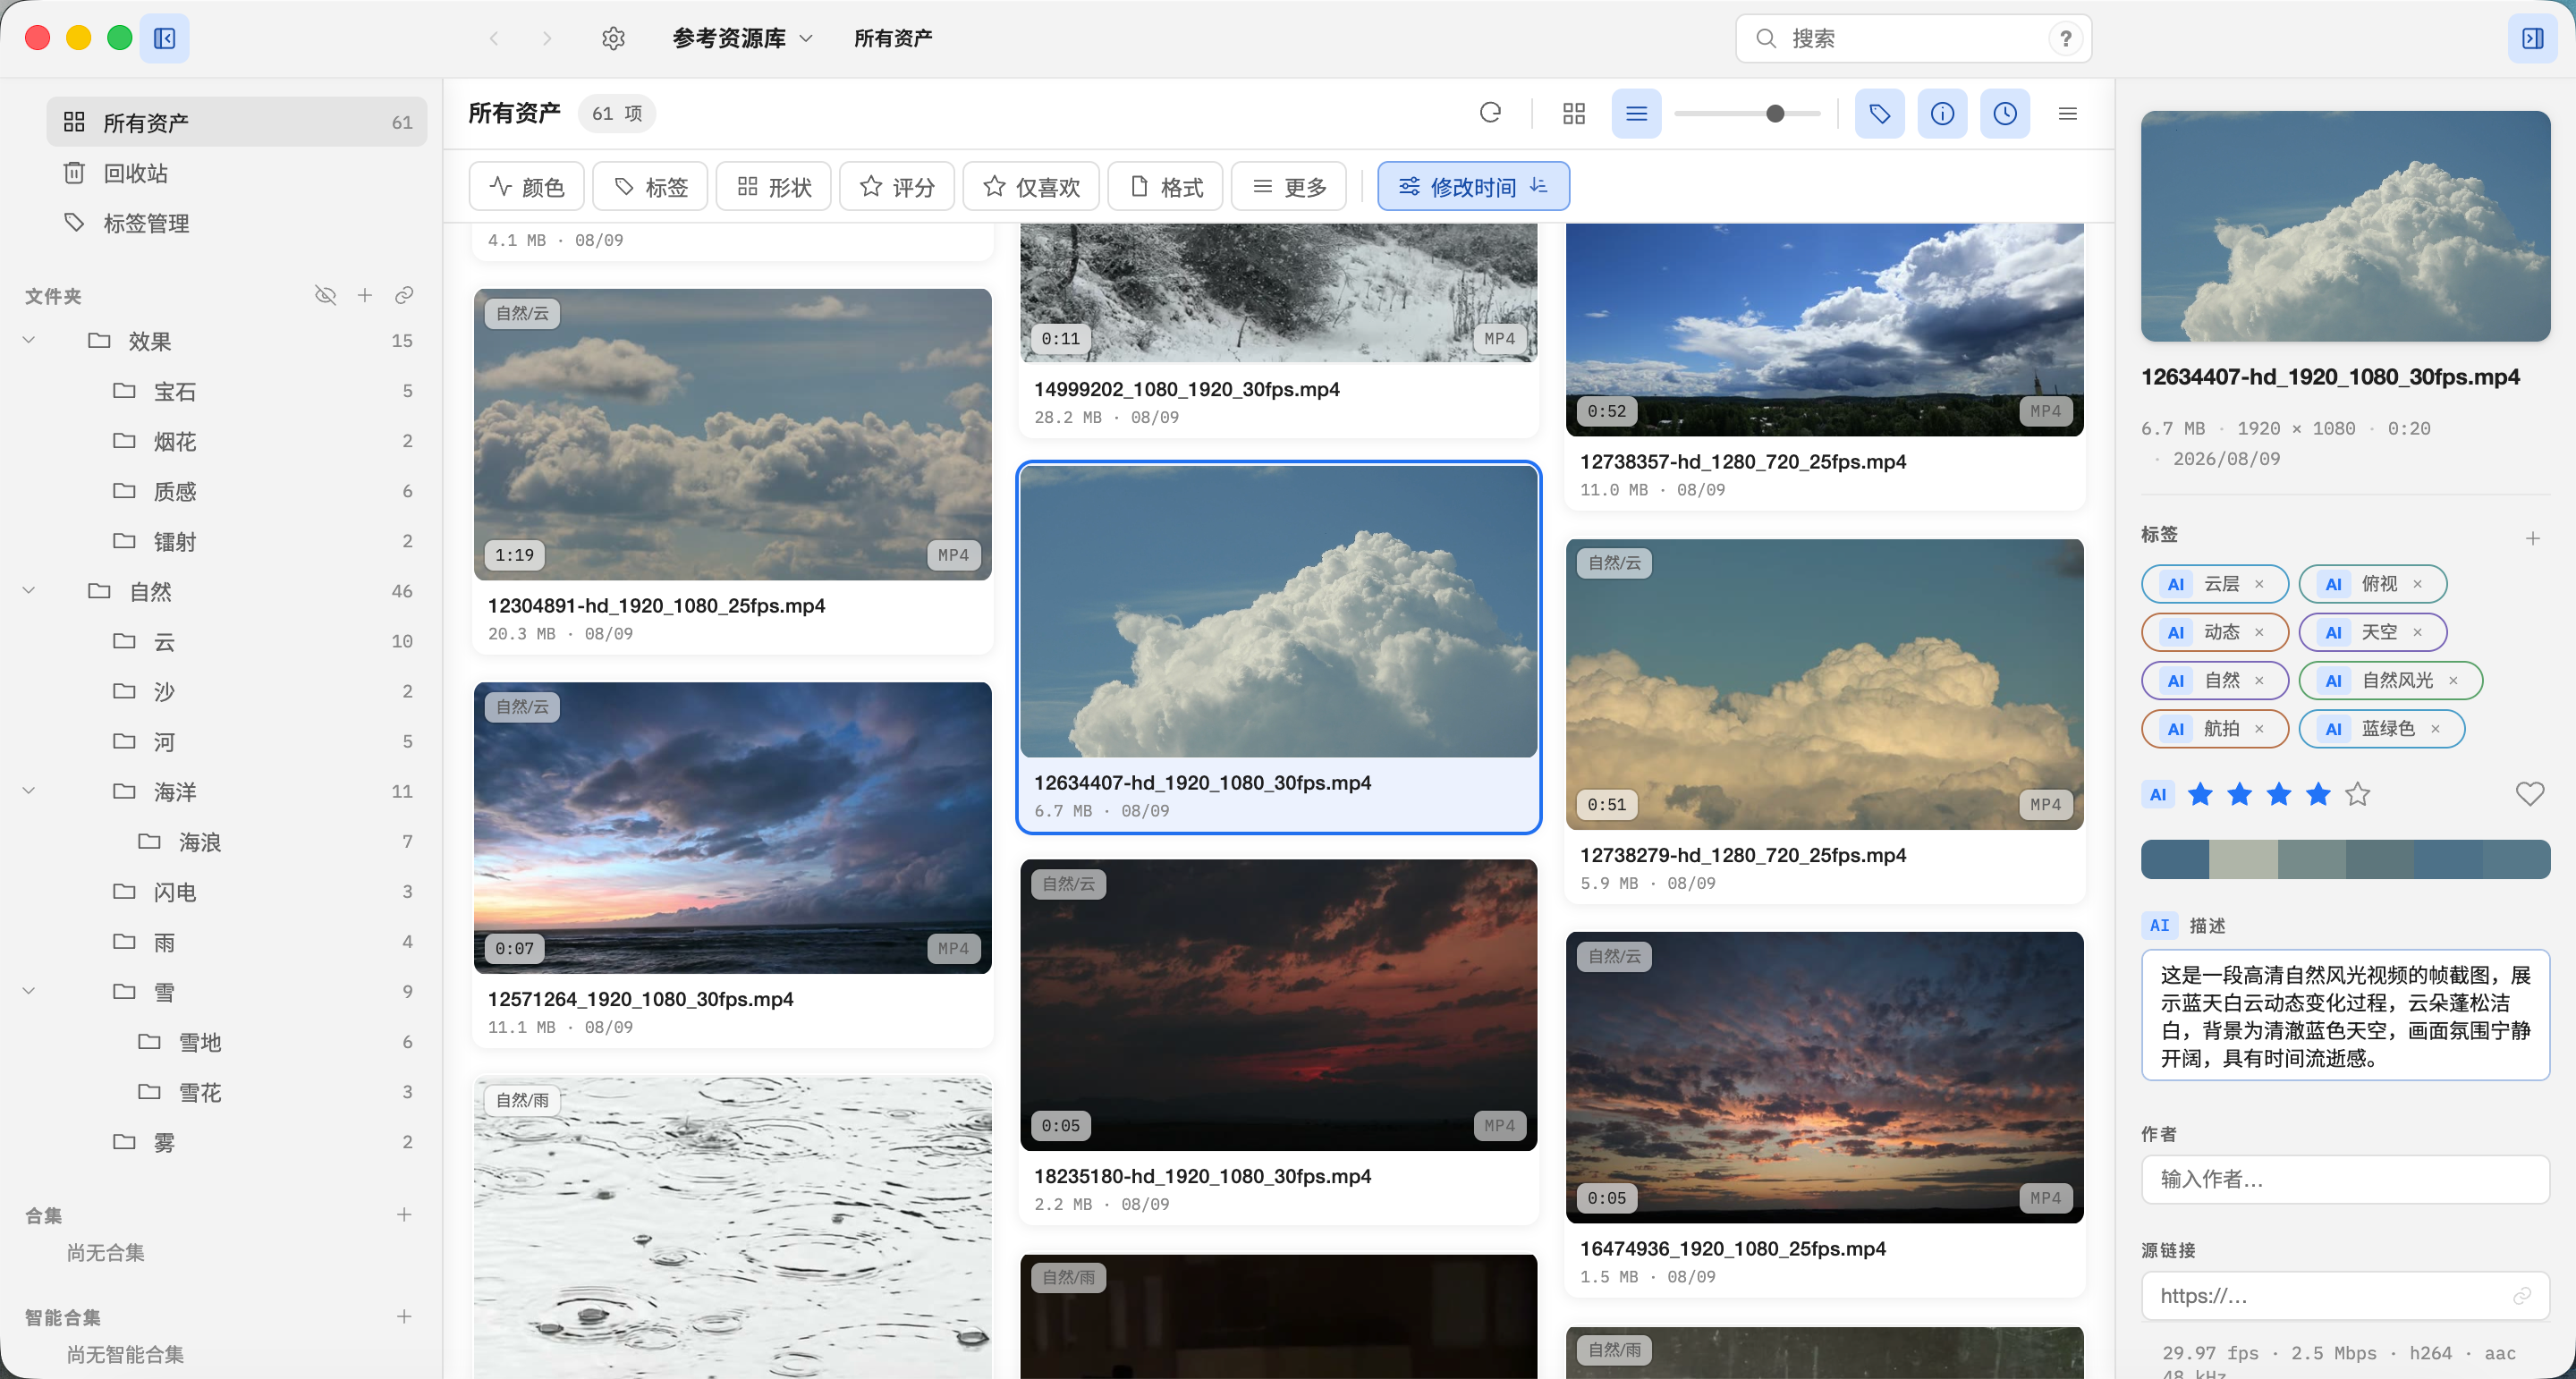
See Basics for the complete workflow.
Documentation status
This directory describes the current user-facing product. Screens and available features can change between releases; follow the latest installer and release notes.